In Grocery-Tracker, there are both "Shopping Lists" and "Stores". "Shopping Lists" are what we shop from. Stores are where we define prices to. Think of the shopping list like a piece of paper. Until you actually shop at a store, the list is good anywhere.
In Grocery-Tracker, prices are kept in 2 places. The Master Product Catalog and your Shopping List. The price in the Master Catalog is "inherited" by your shopping list when you add a product to a shopping list. Subsequent changes to the price in your Shopping List does not update the master catalog. The reason for this is that you may or may not want the Shopping list price to update the catalog. Example:
Item 1 normally sells for $1.99 and that is the price you stored in your Master Catalog. So, $1.99 is the price on your shopping list when you added Item 1 to your list. When in the store, you find it is on sale for $1.59. You don't want all future purchases to reflect $1.59, so the master catalog is not updated.
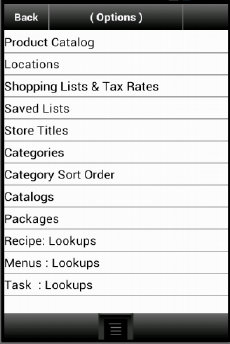
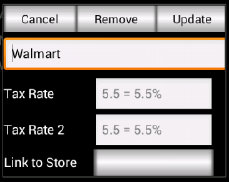
Prices are saved directly in the Product Catalog. Go to More > Options > Products. Select a product. If the More button is not visible on the Products screen, go to More > Settings and scroll down to the "More Details" option. Set it to "All" and go back to the Products screen and the Store pricing fields will be available. You can save prices for up to 12 stores and a default price for use when your Shopping List is not linked to a Store.
In order to save prices from a Shopping list, you must
first link your shopping list to a store as follows:
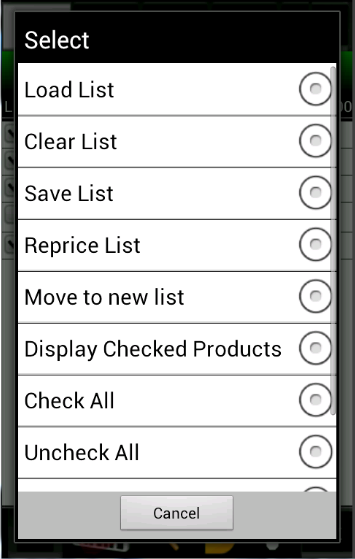
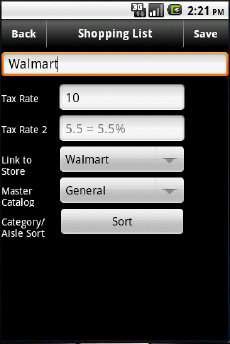
- Go to "More -> Options -> Shopping Lists"
2. Tap the shopping list you want to link.
3. Select the "Link to Store" option.
- Select the store to link to and save.
Now that the shopping list is linked to a store, when you change prices in your Shopping List, and from the "Shop Cart" screen, select the "Clear Cart" and then "Save Prices" option or from the "Stock Cart" screen, select the "Stock Cart" option, prices for that store will be updated in the Product Catalog to what is currently in your shopping list.
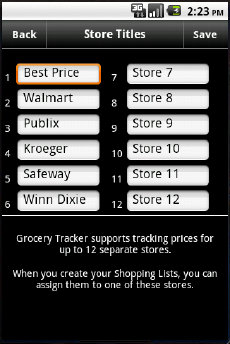
Optionally, you can Name your stores:
- Go to "More ->Options -> Store Titles"
- Enter the titles for your stores.

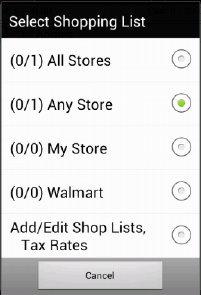
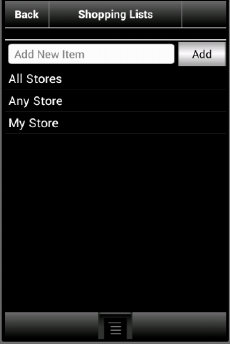
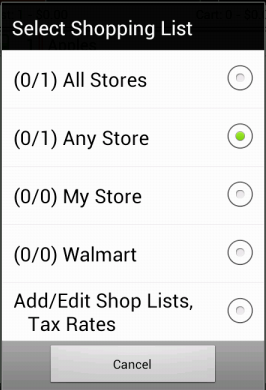
There are 2 different types of Shopping Lists. Special lists, Any Store and All Stores, and normal lists that you
create.
All Stores: The All Stores option is really not a list at all, but instead provides a quick method to view ALL of
your shopping lists together.
Any Store: Products added to the Any Store list will appear on any of your shopping lists. This provides a convenient
place to add products that will then appear on any list.
You can use the "Filter" (looks like a funnel) option to Remove Any Store products from the current list view.
Please note: you cannot add products to the All Stores list. This is only for viewing all your shopping lists together.
Simple to use! - Simply Powerful!
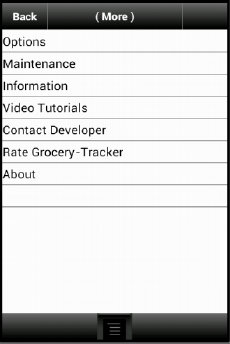
Grocery-Tracker
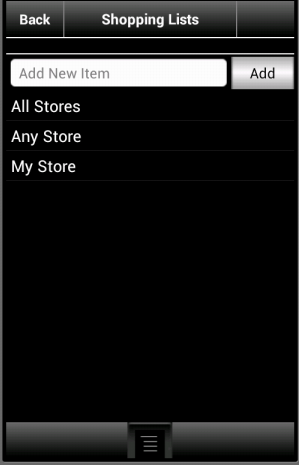
To create a new Shopping List, just go to the "More" screen and select "Options". Then, select "Shopping Lists & Tax Rates".
This screen will allow you to create as many shopping lists as you want. Just enter your new list in the "Add New Item" box
and tap "Add".
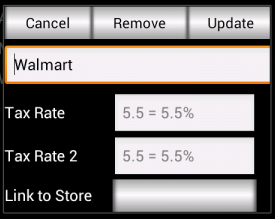
You can optionally add tax rates and link the list to a Store by tapping on the list and filling in the
data.
Optionally, from the "Shop @" screen, (Green Title Bar), just tap the title itself. Then, select the "Add/Edit Shop List, Tax
Rates" option.
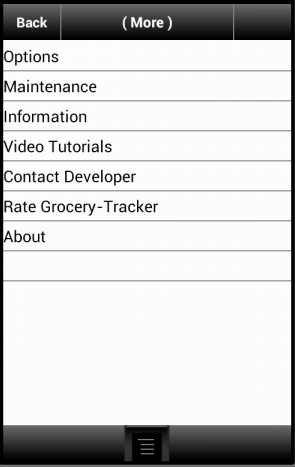
If you are using the standard initial interface, tap the "Options" button and select "More", then "Options" and finally "Shopping
Lists".